Now you have audio in your Ardour sequence! How cool is that!?!? Note that the tempo flag has been changed to 96 BPM to reflect the original tempo in Hydrogen. If your recording did not end exactly on the beat (like mine) you can fix that by opening the "Snap-to" pull down menu and setting it to bars, beats, or whatever you require.

To resize the region, simply drag the title bar (coloured bottom section) of the region from one of the sides. Note that in this picture, the cursor superimposed by Apple's Grab program is not the cursor you will see while dragging your region, the proper cursor is a horizontal double arrow, like the one you would see when resizing a window. Also note that your position in the song is displayed next to the cursor as your resize the region.

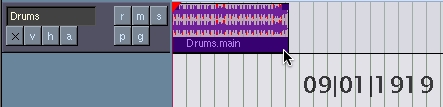
At this point, it's a good idea to rename our region (remember, in ardour, a region is a clip of sound) so that we don't accidentally delete it thinking that it is inconsequential. Right click on the newly-created region and then under the main region menu (at the top of the pop up menu) select popup region editor.When the region editor appears, remane your track to something useful like the example in the picture.
Having beats is nice, but we like it better with extra spice, so let's import a soundfile of a melody into our sequence to go along with the beat. Add another track the same way you did before, and give it a name like "Melody" or "keokuk" or "Shasta!"

Right-click on the empty track area of the second track (melody). Select the "edit" menu, then "import external sndfile". A dialog will popup and you can browse for your file. Ardour also has a soundfile library for easier access to your clips. You can add files to the soundfile library by clicking the ( Windows > Audio Library ) menu then going to the Soundfile Library tab and clicking add to library.
Alternately, you can click on the title bar of the Regions/Name section of the editor window and select import audio.
You can use my sound file or your own. It is better to import (copy) than to link because in the process of importing your file will automatically be converted to the proper sample rate and format.
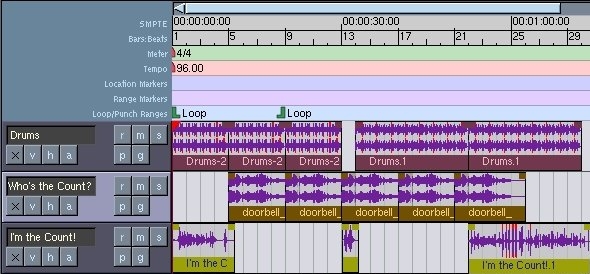
In the screenshot below, you can see that I have looped both regions. I did this by simply dragging them in from the Regions list on the right hand side of the screen. An alternate way to do that is to right click on a region and use the edit menu popup to copy and paste them at the mouse cursor or the blue edit cursor. I've also added a secondary drum beat and looped it

These two tracks will form the basis of our song. But why not add a bit of vocal recording? Create a new track and give it a nice name. Make sure the track is assigned to take your mic's signal as input. I used the built-in mic on my iBook, so the input I assigned to track three was Built-In Audio. Record the track in the same way you did the hydrogen drum patterns. Make sure you record-enable it by clicking the "r" button on the track before pressing play.
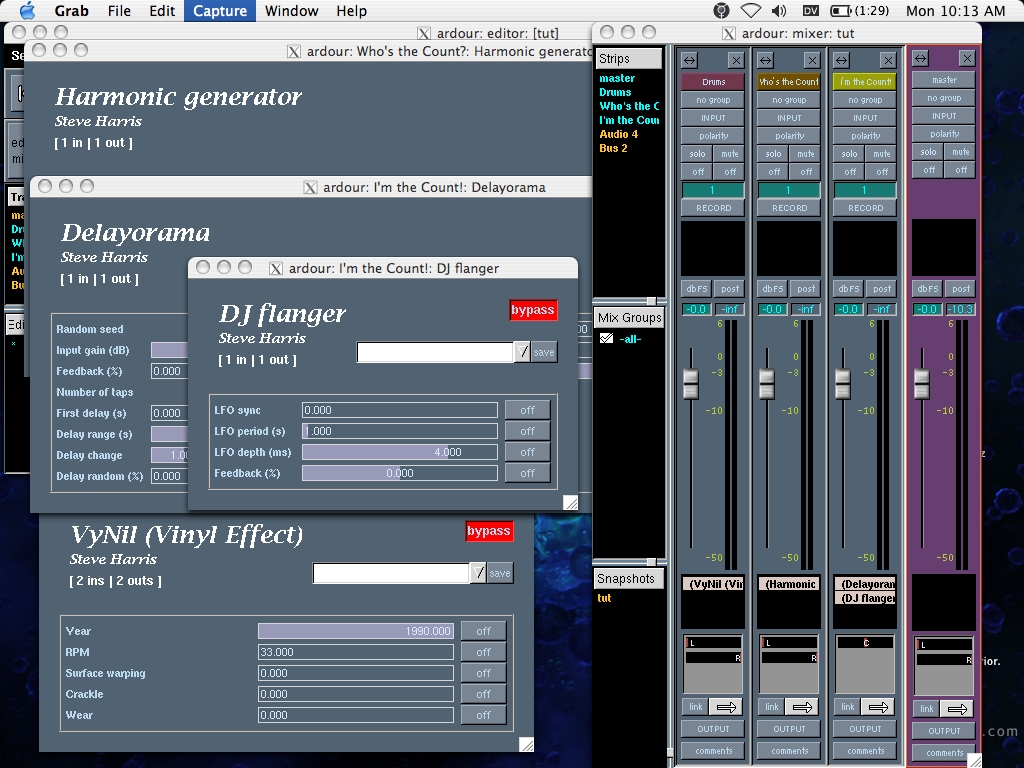
The track is starting to take shape, but what if we want to tweak our sound? Well lucky for us, there's LADSPA!! Ladspa stands for Linux Audio Developers Simple Plugin API, and there is a great suite of Free plugins maintained by Steve Harris at plugin.org.uk. You can get a dmg file of these plugins lovingly compiled and packaged by Jonathan Dempsey [download]. Put the files in /usr/local/lib/ladspa. This may not work with the beta23 of ardour in the pre-packaged dmg file, but then again it might - i haven't tried it. I'm using beta28, compiled on CLI with the help of gentoo macos

Once you have the plugins installed, restart Ardour (don't forget to save!) and open up the mixer window. See the black rectangle about 3/4 of the way down the mixer strip? That's the sends list. Think of a mixer strip as a signal path. Follow the signal as it flows from the top down through inputs, varispeed settings, volume controls, plugins and sends, pan control and then output. Right-click on the empty sends list and select "New Plugin" from the popup menu.
You'll be presented with a list of available LADSPA plugins. experiment and choose the one that's right for you. I really like the VyNil effect. It creates an old worn out vynil record sound.

In the screenshot below, you will find a bouquet of various LADSPA plugins. aaahhh... le mot juste...
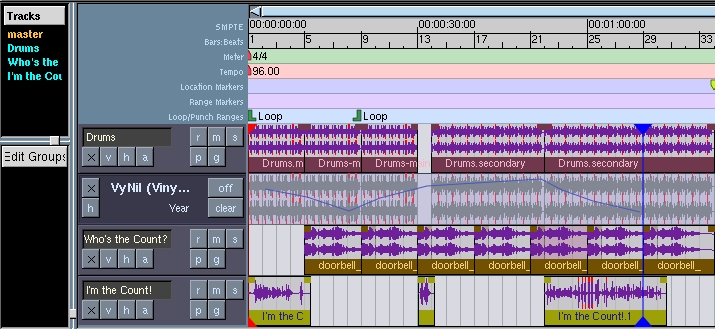
Pretty nifty, huh? But that's not all! You can automate the different settings for each plugin, as well as the pan and gain of each track!! Click on the little "a" button for the track you wish to automate in the editor window. you can create an anchor point by clicking in the automation region. note the cool custom cursors (bonus points for alliteration!)
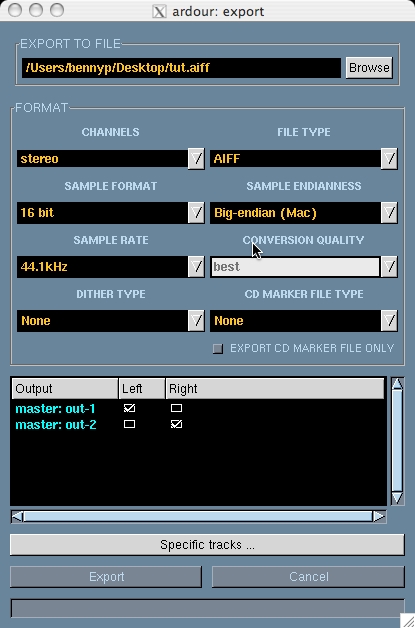
Our song is ready for export!! Click the Sessions > export menu. A dialog box will pop up. Name your file, and select master out one as left and master out 2 as right, as well as any other options you see fit. When You're ready, click export.
WARNING: MAKE SURE YOU SAVE YOUR SESSION BEFORE EXPORTING! CRASHES HAVE BEEN KNOWN TO OCCUR!!
Listen to the final result here: [download]
Well that's it for now. I may add more later on! Happy Hacking!
Written by Ben Powers all words and images cc by-nc-sa 2.0